Gemstone Cutting and Polishing Techniques Mastery
The art of cutting and polishing gemstones has been practiced for centuries. Highly skilled gem cutters transform rough stones into glittering objets d'art using specialized tools and techniques. Cutting brings out a gem's inner radiance by allowing light to pass through and bounce around inside, while polishing adds external sparkle and smoothness.
Mastering the complex facets of this craft requires patience, dexterity, artistry, and an intuitive understanding of optical physics. This article explores essential gemstone cutting and polishing methods from a historical and practical perspective.
Key Takeaways:
- Gemstone cutting and polishing techniques are essential for transforming rough crystals into beautiful gemstones.
- Examining the rough crystal and planning the cut are crucial steps in the process.
- Preshaping and dopping prepare the rough for precise faceting.
- Faceting involves placing precise angles and facets on the stone to maximize its brilliance.
- Polishing adds the final touch, bringing out the gemstone's luster and sheen.
The Rough - Shaping the Foundation
The first step in the gemstone cutting and polishing process is working with the rough crystal. The shape, size, and form of the crystal will determine the final shape of the finished gemstone. The cutter must carefully examine the rough, considering any inclusions, color banding, or zoning that may affect the orientation of the cut.
In some cases, standard sizes may be cut for less rare gems, but for fine gemstones, the shape of the rough usually dictates the shape of the finished piece. The goal is to maximize the yield and maintain the weight of the rough while creating a beautiful and symmetrical gemstone.

There are various techniques used for gemstone shaping, depending on the desired final design and the properties of the rough crystal. Some common shaping methods include:
- Gemstone Grinding: Grinding is a technique used to remove excess material and shape the rough crystal. This process involves using grinding tools such as diamond wheels or grinding wheels to carefully shape the gemstone.
- Gemstone Cabochon Cutting: Cabochon cutting is a popular technique for shaping gemstones. It involves creating a smooth and domed shape on the top surface of the gemstone, known as the cabochon. This technique is commonly used for opaque gemstones or those with unique color patterns.
- Gemstone Faceting: Faceting is another shaping technique that involves cutting and polishing precise flat surfaces, known as facets, onto the gemstone. This technique is used to enhance the brilliance and sparkle of transparent gemstones.
Each technique requires skill and precision to achieve the desired shape and symmetry while maintaining the integrity of the gemstone. The choice of shaping technique depends on factors such as the type of gemstone, its size, and the desired final design.
| Technique | Description |
|---|---|
| Gemstone Grinding | Removing excess material and shaping the gemstone using diamond or grinding wheels. |
| Gemstone Cabochon Cutting | Creating a smooth and domed shape on the top surface of the gemstone. |
| Gemstone Faceting | Cutting and polishing precise flat surfaces, known as facets, onto the gemstone to enhance its brilliance and sparkle. |
Planning the Cut - Designing for Brilliance
Once we have examined the rough gemstone and determined its shape, the next step in the gemstone cutting and polishing process is planning the cut. Planning is a crucial stage that involves careful consideration of various factors to maximize the stone's optical performance and create a symmetrical and brilliant gemstone.
When planning the cut, we take into account several important aspects. First, we identify and remove any bad inclusions that may affect the overall appearance of the gemstone. This ensures that the final piece is clean and free from any visible flaws. Additionally, we address any color banding or zoning in the rough, ensuring that the finished gemstone showcases a consistent and desirable color distribution.
Another key consideration in planning the cut is determining where the table and pavilion—the top and bottom facets of the gemstone—will be positioned. The table is the largest and most visible facet, so its placement plays a critical role in the overall design and brilliance of the gemstone. The pavilion, on the other hand, contributes to the gemstone's depth and light reflection.

To create a truly exceptional gemstone, careful planning may involve slicing the rough to remove excess material or using a lap to remove included areas. This meticulous process ensures that the final cut maximizes the gemstone's potential and results in a symmetrical and brilliant masterpiece.
Once the rough has been cleaned and prepared, the next step in the gemstone cutting and polishing process is preshaping. This crucial step sets the foundation for the faceting process. To achieve the desired shape, the cutter uses a spinning wheel called a lap, which is coated with diamond powder. Holding the rough stone in hand, the cutter meticulously grinds it against the lap to create the basic shape of the cut. This initial shaping stage requires precision and skill to create the desired form and symmetry.
After preshaping, the stone is ready for dopping, which involves attaching the gemstone to a metal rod called a dop. Special dopping wax is used to secure the stone to the dop, providing stability and control during the subsequent faceting process. By attaching the stone to the dop, the cutter gains better maneuverability and control when manipulating the gemstone's facets. This ensures precise cutting and allows for optimal shaping and alignment.

Faceting - Unlocking the Gem's Brilliance
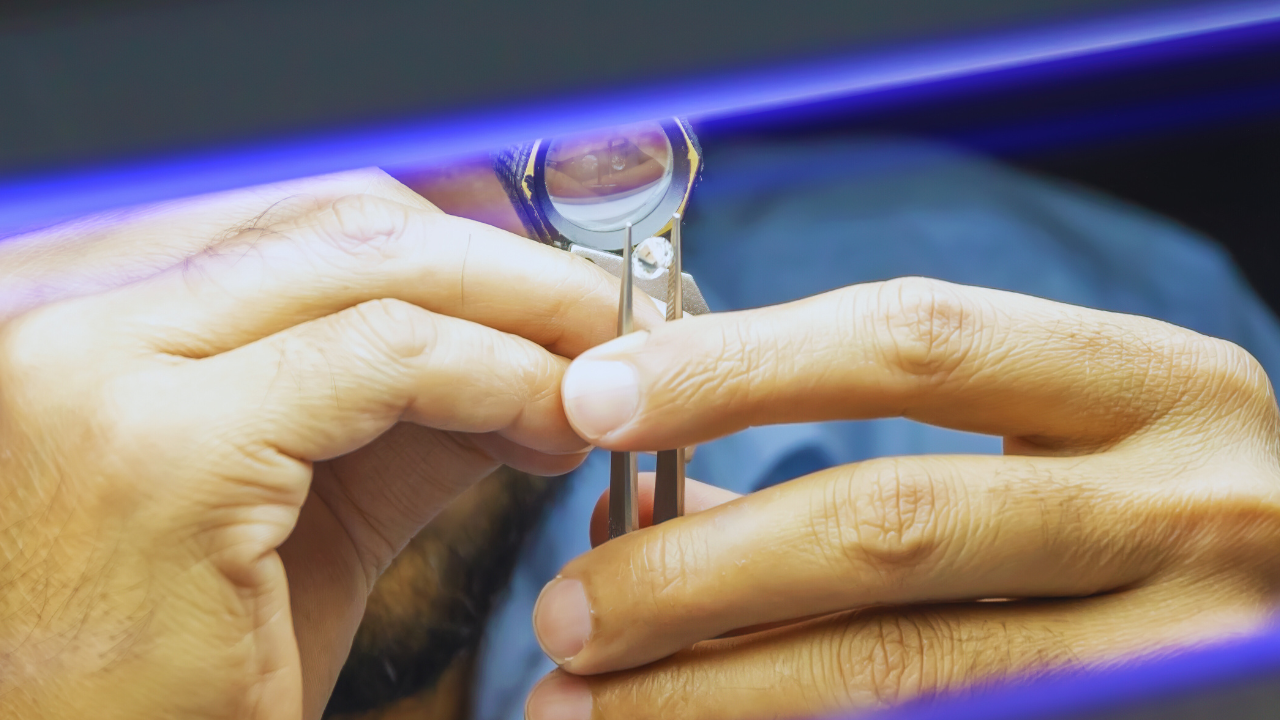
Faceting is a crucial step in the gemstone cutting process that allows us to unlock the brilliance and beauty of a gem. Using specialized lapidary techniques, we carefully place precise angles and facets on the table and pavilion of the stone to optimize its optical performance and light reflection.
Faceting is a highly skilled and complex technique that requires a deep understanding of gemstone properties and a mastery of lapidary tools. With each facet individually placed using the Height, Angle, Index triangle, we strive to create a symmetrical and scintillating gemstone that captivates the eye.
To achieve the desired brilliance, we use a faceting lap that is finer and contains diamond powder. This lap ensures that each facet is finely polished and reflects light at its best, enhancing the gem's sparkle and allure.
The ultimate goal of faceting is to create a gemstone that captures and reflects light in a captivating way. By carefully designing and placing each facet, we maximize the gem's beauty and luster, transforming it into a true work of art.

Experienced master cutters are highly valued for their expertise in faceting. Their attention to detail and precise craftsmanship ensure that each gemstone shines with brilliance and showcases its unique characteristics.
Gemstone Faceting Techniques Comparison
| Technique | Pros | Cons |
|---|---|---|
| Traditional Hand Faceting |
|
|
| Machine Faceting |
|
|
Polishing - Adding the Final Shine
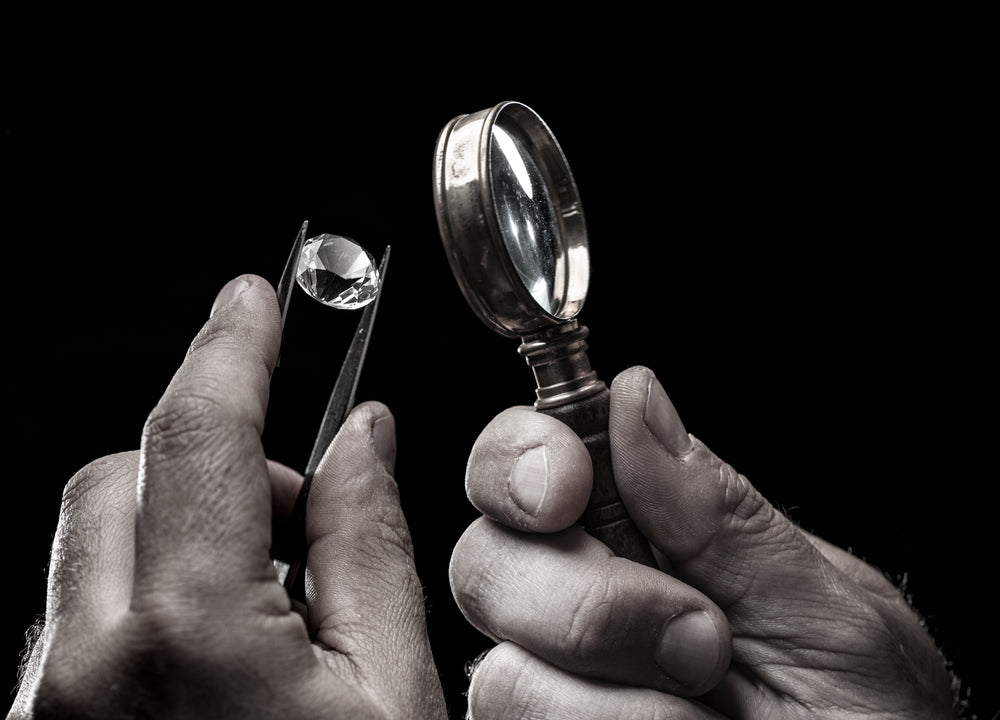
The final step in cutting and polishing a gem is polishing. Using a special polishing wheel primed with diamond powder, each facet is individually polished to a high luster and brilliance. This step enhances the brilliance and beauty of the gemstone, giving it a finished and attractive appearance. A skilled cutter knows how to achieve a symmetrical and dazzling result through careful polishing and attention to detail.
Polishing plays a crucial role in bringing out the true potential of a gemstone. By smoothing the surfaces of each facet, the cutter can maximize the light reflection and refraction of the gemstone, resulting in a stunning play of color and an overall captivating appearance. The process uses progressively finer polishing passes to refine the surface of the gemstone, gradually removing any imperfections or scratches.
During the polishing stage, the cutter focuses on achieving a mirror-like finish on each facet. This is done by applying the right amount of pressure and using the appropriate polishing techniques. The goal is to create a flawless surface that allows light to pass through and interact with the gemstone in the most captivating way.
Attention to detail is critical during the polishing process. Each facet must be polished evenly and consistently to ensure that the gemstone maintains its symmetry and balance. The cutter must also consider the design and cut of the gemstone when determining the appropriate polishing techniques.

Once the polishing is complete, the gemstone reveals its true brilliance and beauty. Light dances across the polished surfaces, revealing the gem's color, clarity and sparkle. A well-polished gemstone is a testament to the skill and expertise of the cutter, as it demonstrates their ability to transform a rough stone into a stunning jewel.
Light Leakage - Balancing Optics and Design
One of the primary challenges in gemstone cutting is achieving a delicate balance between optimal light return and the overall design of the stone. Different gem materials, such as diamonds, sapphires, and rubies, have distinct critical angles that affect their brilliance and reflection. To maximize a gemstone's optical performance, the angles for each facet must be meticulously adjusted.
When cutting the pavilion, or bottom, of a gemstone, it's crucial to avoid cutting too deep or too shallow. If the pavilion is cut too deep, it can result in a phenomenon known as "windowing," where light leaks out of the gemstone, causing an area to appear dull and unreflective. Conversely, if the pavilion is cut too shallow, light can escape prematurely, resulting in a lack of overall brilliance.
To avoid these issues, skilled gemstone cutters understand the critical angles specific to each gem material. By working with precision and expertise, they ensure that every facet is cut to optimize light reflection and brilliance. This careful balance between the gemstone's optical performance and its design is crucial in creating exquisite and captivating gemstones.
Optimizing Light Reflection: Key Factors
- Understanding the critical angles for different gem materials
- Precisely adjusting the angles of each facet to maximize light return
- Ensuring the pavilion is cut at the correct depth to avoid light leakage
Example Critical Angles for Gemstone Facet Design
| Gem Material | Critical Angle (Approximate) |
|---|---|
| Diamond | 24 to 37 degrees |
| Sapphire | 14 to 41 degrees |
| Ruby | 10 to 22 degrees |
By adhering to the appropriate critical angles for gemstone facet design, cutters can ensure that the gemstones they create exhibit exceptional brilliance and shine. This meticulous attention to detail results in stunning pieces of jewelry that captivate and delight their owners.

What Can Go Wrong - The Challenges of Gem Cutting
Gemstone cutting is a meticulous process that requires precision and expertise. While it can result in stunning gemstones, there are various challenges faced by gem cutters that can impact the final outcome.
One of the main challenges in gem cutting is the risk of damage during the preforming stage. This stage involves shaping the rough material using grinding machines. However, there may be non-visible stress fractures within the stone that can cause it to shatter or break during the shaping process. This can be devastating, especially when working with valuable gemstones.
Another challenge is achieving the desired shape and proportions while maximizing weight retention. Gem cutters aim to create gemstones that exhibit optimal brilliance and beauty. However, a poorly executed cut can result in a gemstone that lacks the desired characteristics. It takes skill and experience to strike the right balance between shape, proportions, and weight retention.
Unraveling the Mysteries of Gemstone Faceting - A Beginner's Guide
Gemstone faceting may seem complex to beginners, but it can be broken down into simple steps. By understanding the basic elements that govern the arrangement of facets on a gemstone, anyone can embark on the journey of creating their own dazzling gemstones. Let's delve into these key elements and explore the world of gemstone faceting.
Gemstone Faceting Elements
There are three fundamental elements to consider when arranging facets on a gemstone:
- The Angle of the Cut: The angle at which the facets are placed on the gemstone determines how light interacts with the stone, affecting its brilliance and sparkle.
- The Rotation of the Gem: Controlling the rotation of the gem while cutting allows for precise alignment of facets and symmetrical shaping.
- The Depth of the Cut: The depth of each individual facet influences the overall shape, proportions, and optical performance of the gemstone.
To achieve these precise cuts, faceting machines are used as valuable tools for both beginners and experienced cutters. These machines offer controls that enable adjustments to be made to the angle of the cut, rotation, and depth, facilitating accurate and meticulous gemstone cutting.

As a beginner, one popular choice for learning gemstone faceting is the round brilliant cut. This timeless cut showcases the gem's brilliance and beauty, and its standard design allows for consistency and simplicity in the faceting process. With dedication and adherence to instructions, aspiring gem cutters can master the art of faceting and create their own stunning gemstones.
Gemstone Faceting Illustrated
To help you visualize the faceting process, here's an example of a gemstone faceting procedure using a round brilliant cut:
| Step | Description |
|---|---|
| 1 | Examining the rough gemstone to determine its potential shape and size. |
| 2 | Planning the cut, considering the desired angles, rotations, and proportions. |
| 3 | Shaping the stone, removing excess material to prepare for faceting. |
| 4 | Faceting the stone by precisely placing the facets according to the planned design. |
| 5 | Polishing the facets to achieve a brilliant shine and superior optical performance. |
By following these steps and gradually gaining experience, beginners can unlock the mysteries of gemstone faceting and create their own unique and captivating gemstones.
The Basic Controls - Setting the Stage for Faceting
Faceting machines have basic controls that allow for precise cutting. These controls are essential in achieving the desired angles and facets on a gemstone.
The first control is for setting the angle of the cut. Depending on the machine, this can be done using a protractor or a digital display. The angle determines the shape and overall appearance of the finished gemstone.
The second control is for controlling the rotation of the gem. This is done using an index gear, which can be set to different sizes. The rotation determines the position of the facets and plays a crucial role in maximizing the gemstone's brilliance.
The third control is the depth control. This control allows the cutter to determine how deep each facet is cut. Fine or coarse adjustments can be made depending on the desired result. The depth control is essential in achieving symmetry and optimal light reflection.
Some machines also have a "cheater" control, which allows for subtle adjustments during the cutting process.
Water is used as a lubricant to keep the cutting laps wet and to prevent overheating. It ensures smooth cutting and prolongs the life of the cutting laps and polishing tools.
Overall, these basic controls provide the foundation for successful gemstone faceting. With precise control over the lap angles, index gears, depth control, and the use of appropriate polishing tools, a skilled cutter can create stunning gemstones that captivate with their brilliance and beauty.
How to Cut Gemstones by Hand and with a Tool
Cutting gemstones by hand can be an alternative option for those who don't have access to a faceting machine. This low-tech approach involves using sandpaper to shape and polish the gemstone.
To cut a gemstone by hand, follow these steps:
- Select the appropriate sandpaper grit based on the desired outcome. Coarser grits, such as 80 or 100, are used for shaping and removing material, while finer grits, like 600 or 1200, are used for polishing.
- Secure the gemstone firmly in your hand and rub it against the sandpaper. Move the gemstone in a circular or back-and-forth motion to achieve the desired shape.
- Start with the coarser grit to shape the gemstone and gradually progress to finer grits for polishing. Rinse the gemstone and the sandpaper with water frequently to prevent overheating and to wash away debris.
- Inspect the gemstone periodically to assess its progress. Make adjustments as needed to achieve the desired shape and polish.
- Once you are satisfied with the shape and polish, rinse the gemstone thoroughly and dry it with a soft cloth.
A tool such as a Dremel can also be used for cutting gemstones. A Dremel is a versatile rotary tool that can be equipped with various attachments and accessories for different tasks.
To cut a gemstone with a Dremel, follow these steps:
- Select a cutting attachment or burr suitable for gemstone cutting. Diamond-coated attachments are commonly used due to their hardness.
- Secure the gemstone in a holder or vise to provide stability during the cutting process.
- Attach the chosen cutting attachment to the Dremel tool and adjust the speed setting to a suitable level.
- Begin cutting the gemstone by gently guiding the Dremel tool along the desired path. Apply light pressure and let the tool do the work.
- Periodically check the progress and make any necessary adjustments to ensure the desired shape and polish.
- Once the cutting is complete, switch to a polishing attachment or buffing wheel to achieve a smooth and shiny finish.
- After polishing, thoroughly clean and dry the gemstone to remove any residue.
Both methods of cutting gemstones require practice and attention to detail. It is essential to take your time and work slowly, making gradual adjustments as needed. Always wear eye protection and follow safety guidelines when working with tools or abrasive materials.
Conclusion
Gemstone cutting and polishing techniques form the bedrock of crafting unparalleled gemstones. This intricate process involves scrutinizing raw crystals, orchestrating meticulous cuts, shaping stones, and executing the artful precision of faceting and polishing.
Mastery of these techniques demands years of dedication, resulting in gemstones that radiate exceptional brilliance and timeless beauty. Whether employing modern tools or traditional handcraft, the journey of gemstone cutting captivates and rewards.
From the initial crystal inspection to the final polish, each step is pivotal in revealing the gem's unique qualities. This fusion of science and craftsmanship, incorporating precise calculations, transforms nature's wonders into breathtaking wearable art, promising a journey as captivating and inspiring as the gemstones themselves.
FAQ
Can you explain the process of gemstone cutting and polishing?
Gemstone cutting and polishing involves examining the rough crystal, determining the shape and size of the finished piece, planning the cut, preshaping and dopping the rough, faceting the stone, and finally, polishing each facet to create a high sheen and luster.
How is the shape of the gemstone determined?
The shape of the gemstone is determined by carefully examining the rough crystal and considering factors such as inclusions, color banding, and the natural shape of the stone. The goal is to maximize the yield and maintain the weight of the rough while creating a beautiful and symmetrical gemstone.
What is involved in the planning of the cut?
The planning of the cut involves removing bad inclusions, addressing color banding or zoning, and deciding where the table and pavilion of the gemstone will be positioned. Careful planning is essential to maximize the stone's optical performance and create a symmetrical and brilliant gemstone.
What is preshaping and dopping?
Preshaping involves using a spinning wheel called a lap, primed with diamond powder, to grind the rough stone and create the basic shape of the cut. Dopping is the process of attaching the rough stone to a metal rod called a dop using special dopping wax, which allows for better control and maneuverability during the faceting process.
How is faceting done?
Faceting involves using a faceting lap, which is a finer lap with diamond powder, to place precise angles and facets on the table and pavilion of the stone. The cutter uses the Height, Angle, Index triangle to individually place each facet, aiming to create a symmetrical and scintillating gemstone that reflects light at its best.
What is the purpose of polishing?
Polishing is done using a specialized polishing lap primed with diamond powder. It enhances the brilliance and beauty of the gemstone by creating a high sheen and luster on each facet. Skilled cutters pay attention to detail to achieve a symmetrical and scintillating result through careful polishing.
How do you balance light return with the overall design of the gemstone?
The critical angles for different gem materials need to be understood to maximize the gemstone's optical performance. If the pavilion of a gemstone is cut too deep or too shallow, it can result in light leakage and a dull area known as a "window." Skilled cutters adjust the angles of each facet to ensure maximum light reflection and brilliance.
What are the challenges of gemstone cutting?
Gemstone cutting can be risky, with potential pitfalls such as the risk of damage during the preforming stage, where rough material is shaped using grinding machines. Achieving the desired shape and proportions while maximizing weight retention can also be a challenge, as a bad cut can ruin a valuable piece of rough and result in a gemstone with less brilliance and beauty.
Can gemstones be cut and polished by hand?
Yes, gemstones can be cut by hand using sandpaper or a tool such as a Dremel equipped with cutting attachments or burrs. These methods offer alternatives for those who don't have access to a faceting machine, although they require practice to achieve the desired shape and polish.
How can beginners learn gemstone faceting?
Gemstone faceting can be broken down into simple steps. Beginners can start by learning the round brilliant cut and follow instructions to learn the standard cuts. The use of faceting machines with basic controls, such as setting the angle of the cut, the rotation of the gem, and the depth of the cut, allows for precise cutting.