
How to Polish Gemstones Safely?
Polishing gemstones can bring out their natural brilliance and beauty, but it requires care and the right techniques to avoid damaging delicate stones. In this beginner's guide, learn how to properly prep gems for polishing, choose the right polish and tools, and techniques for smoothly faceting edges without fracturing the gem.
From soft stones like amber to hard crystals like sapphires, we'll cover safety gear needed when dealing with diamond abrasives, best practices for setting rotation speed, how to check your progress, and troubleshooting issues like pitting. With a little patience and this advice, you can achieve stunning results polishing precious gems in your own workshop.
What is Rock Tumbling?
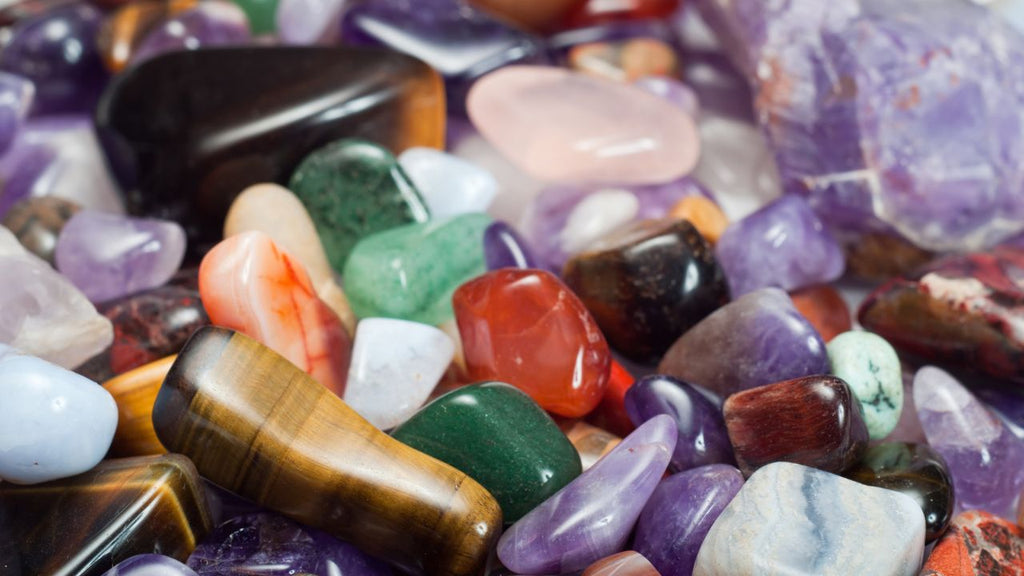
Rock tumbling is a popular method for cleaning and polishing gemstones to achieve a smooth and shiny finish. This process involves placing the gemstones in a barrel along with water and special sand. The barrel is then rotated for an extended period of time, which causes the gemstones to rub against each other and the sand, resulting in the removal of dirt, grime, and imperfections.
During the rock tumbling process, the gemstones go through several stages that require different types of sand for cleaning. Each stage helps to refine the gemstone's surface and bring out its natural luster. The length of time spent in each stage will depend on the hardness of the gemstone and the desired outcome.
Rock tumbling offers a range of benefits for gemstone cleaning and polishing. It is a gentle method that does not involve any harsh chemicals or abrasive tools, making it safe for use on a variety of gemstones. Additionally, rock tumbling can help to reveal the hidden beauty of gemstones by removing surface imperfections and enhancing their natural colors and patterns.
| Type of Sand | Stage |
|---|---|
| Rough Grit | Coarse grinding to remove surface imperfections |
| Medium Grit | Smoothing and refining the gemstone's surface |
| Fine Grit | Adding a final polish and achieving a smooth finish |
Overall, rock tumbling is a versatile and effective technique for cleaning and polishing gemstones, providing stunning results that enhance their beauty and value.
Rock tumbling is a fascinating process that requires careful consideration of several principles to achieve the best results. One of the key principles of rock tumbling is choosing the right gemstones for the process. Not all gemstones are suitable for tumbling, as porous or corrugated gems may not withstand the tumbling process and can be damaged. It is important to select gemstones that are durable and can withstand the abrasion and friction of the tumbling process.
The cleaning environment is also crucial in rock tumbling. The barrel and the sand used should be free from contaminants to avoid scratching or damaging the gemstones. It is recommended to have separate barrels for each stage of the tumbling process to prevent chemical reactions and to ensure efficient cleaning. Additionally, metal jewelry should not be included in the rock tumbling process, as it can degrade and potentially damage the gemstones.
Proper waste disposal is another important principle in rock tumbling. The remnants of the process should not be discarded down the drain or in recyclable waste bins due to their harmful chemical elements. It is essential to dispose of the waste responsibly and in accordance with local regulations to avoid any environmental impact.

| Gemstone Type | Suitable for Rock Tumbling |
|---|---|
| Agate | Yes |
| Quartz | Yes |
| Jade | Yes |
| Opal | No |
| Turquoise | No |
- Choose gemstones that are durable and can withstand the tumbling process.
- Avoid using porous or corrugated gemstones for rock tumbling.
- Ensure the cleaning environment is free from contaminants.
- Use separate barrels for each stage of the process.
- Avoid including metal jewelry in the tumbling process.
- Dispose of waste responsibly to avoid environmental impact.
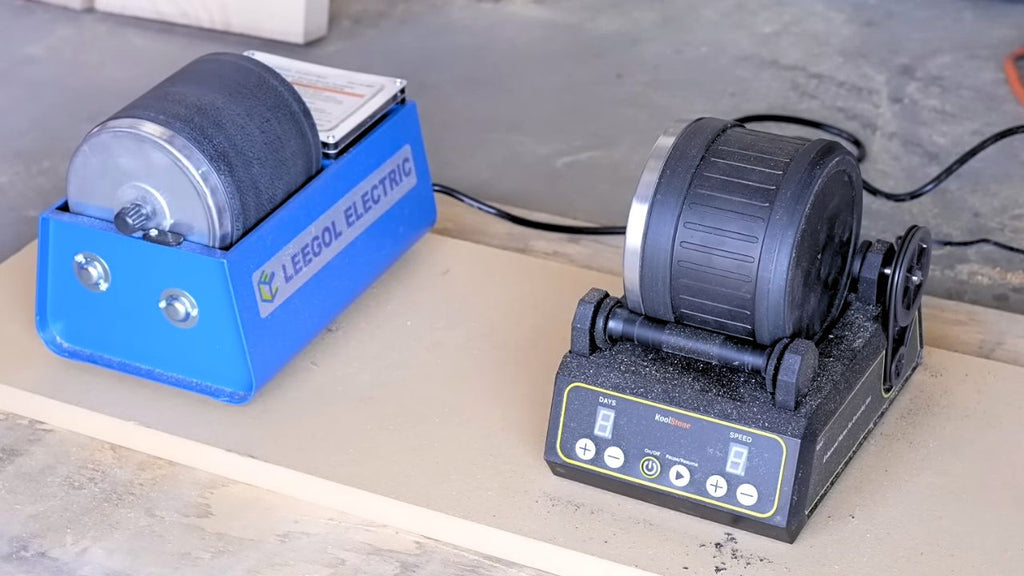
How to Use a Rock Tumbler
Using a rock tumbler is a simple and effective way to polish gemstones. By following a step-by-step process and using the necessary equipment, you can achieve stunning results. Here is a guide on how to use a rock tumbler:
- Clean the gemstones: Before placing the gemstones in the tumbler, make sure to clean them thoroughly to remove any dirt or debris on the surface.
- Add the gemstones to the barrel: Fill the rock tumbler barrel with the gemstones, filling it about two-thirds to three-quarters of the way full. It's important not to overcrowd the barrel to ensure effective polishing.
- Add sand and water: Depending on the stage of polishing, add the appropriate type of sand to the barrel. The sand acts as an abrasive to polish the gemstones. Then, add water to the barrel, filling it slightly above the height of the gemstones.
- Timing for each stage: Start the rock tumbler and let it run for the designated time for each stage. The timing will vary depending on the type of gemstone and the desired level of polish. Typically, each stage lasts several days.
- Cleaning the gemstones: After each stage, strain the dirty water from the barrel and rinse the gemstones thoroughly to remove any mud or residue. Repeat the process for each stage until the gemstones are smooth and shiny.
Using a rock tumbler is a time-consuming process, but the results are well worth the wait. It is an effective method for achieving a professional polish on gemstones.
When it comes to polishing gemstones, one versatile tool that stands out is the Dremel. A Dremel is a rotary tool that offers a wide range of accessories and burrs specifically designed for cutting, sanding, buffing, and yes, polishing gemstones. This versatile tool allows you to restore the shine and smoothness of gemstones with ease, and it is especially useful for carving and engraving intricate designs.
Before diving into polishing precious gemstones, it's a good idea to practice on less valuable alternatives. This will help you gain proficiency with the Dremel and become familiar with its various attachments. With the right accessories, such as sandpaper kits and polishing brushes, you can achieve different effects and finishes on gemstones.
When using a Dremel, it's crucial to exercise caution and operate the tool at the appropriate speed to avoid damaging the gemstones. Slow and steady is the key. Remember to choose the right attachments for the task at hand and apply the appropriate pressure. Regularly wipe off excess polish from the gemstone to check the progress and make any necessary adjustments. With a little practice and patience, you'll be able to use a Dremel to polish gemstones and bring out their natural beauty.
| Benefits of Using a Dremel for Gemstone Polishing | Accessories for Gemstone Polishing with a Dremel |
|---|---|
|
|

Can You Polish Rocks with Your Hands?
While modern techniques like rock tumbling and using a Dremel offer more effective and efficient methods for polishing gemstones, hand polishing with traditional methods can still be done. Craftsmen in the past used brushes, special cloths, and polishing creams to achieve a smooth and shiny finish. One common technique involved using a uniform leather cloth and a special cream to gently polish the gemstones. Another method was to use a brush with the cream and lightly brush the surface of the stone. Water mixed with a small amount of ammonia was also used to clean gemstones and remove oils.
However, it is important to note that hand polishing gemstones is not recommended if you're aiming for a high-quality polish. The process can result in visible scratches and may not achieve the desired level of smoothness and shine. Modern techniques like rock tumbling and using a Dremel tool offer more precise and controlled methods for achieving professional-grade results. These techniques provide better control over the polishing process and allow for experimentation with different finishes.
In summary, while you can polish rocks with your hands using traditional methods, it is not the most effective or efficient way to achieve a high-quality polish. Modern techniques like rock tumbling and using a Dremel tool offer more control and precision, allowing for better results. It's always recommended to use the right techniques and tools to ensure the best outcome when polishing gemstones.

When hand polishing gemstones, there are a few traditional methods that can be used. These methods involve using brushes, special cloths, and polishing creams to achieve the desired shine and smoothness of the gemstones. Here are some commonly used traditional methods for polishing gemstones:
- Using a uniform leather cloth and a special polishing cream to gently polish the gemstones.
- Using a brush with the polishing cream to lightly brush the surface of the stone.
- Using water mixed with a small amount of ammonia to clean the gemstones and remove oils.
While these methods can be effective to some extent, they may not produce the same level of professionalism and precision as modern techniques like rock tumbling or using a Dremel tool. It's important to consider the desired outcome and level of polish you want to achieve when deciding which method to use for polishing gemstones.
| Pros | Cons |
|---|---|
| Simple and accessible | May result in visible scratches |
| Can be done with basic materials | May not achieve the desired level of smoothness and shine |
| Allows for experimentation with different finishes | Not suitable for achieving a professional-grade polish |
Polishing Gemstones by Hand Using Sandpaper
Another method for polishing gemstones by hand is using sandpaper. This technique allows for experimentation with different finishes and is less precise and technical than other methods. Here is a step-by-step method for polishing gemstones using sandpaper:
- Start by gathering the necessary materials: a chopping board, wet and dry sandpaper in various grits, tap water, and a tea towel.
- Lay the lowest-grade sandpaper on the chopping board, rough side up, and pour a small amount of water onto it.
- Rub the gemstone against the sandpaper and water to create a smooth facet. Repeat this process to create several facets and shape the gemstone.
- Gradually move to higher-grade sandpaper, repeating the previous steps with each grit.
- Finally, polish the gemstone with a polishing compound and a clean cloth for a mirror-like finish.

Hand polishing gemstones with sandpaper allows for creativity and the opportunity to achieve unique finishes. Remember to take your time and experiment with different grits to achieve the desired result.
Hand polishing gemstones with sandpaper offers several benefits:
- Experimentation: Using sandpaper allows for experimentation with different finishes, giving you the opportunity to create unique and personalized gemstones.
- Control: Hand polishing gives you complete control over the polishing process, allowing you to focus on specific areas and achieve desired results.
- Affordability: Sandpaper is a cost-effective option for polishing gemstones, making it accessible to beginners and hobbyists.
- Flexibility: Hand polishing can be done anywhere, without the need for specialized equipment or machinery.
Overall, hand polishing gemstones with sandpaper provides a hands-on and creative approach to achieving beautiful finishes and unique designs.
Polishing Gemstones with a Dremel
Using a Dremel rotary tool is an effective method for polishing gemstones to achieve a smooth, shiny finish. The key steps for success are:
- Draw the desired shape onto the gemstone with a fine tip marker. This acts as a guiding line during the polishing process.
- Secure the gemstone in a vice or clamp for stability while working.
- Select an appropriate speed on the Dremel that you are comfortable with. Start slowly and gradually increase the speed as you gain proficiency.
- Use the correct Dremel attachments for the job, such as circular sandpaper kits and polishing brushes. Apply the polishing compound to the wheel.
- Gently carve along the marker line on the gemstone with the polishing wheel. Avoid holding in one spot for too long to prevent damage.
- Frequently wipe off excess polish and check progress.
Practicing first on inexpensive gemstones is advisable to master control of the Dremel tool. By securing the gemstone properly and using the appropriate methods, you can successfully use a Dremel to achieve beautifully polished gemstones.
Tips for Polishing Gemstones with a Ceramic Lap
When it comes to polishing gemstones, using a ceramic lap can yield beautiful results. However, it is important to follow a few tips to ensure a successful polishing process. Here are some tips to consider when using a ceramic lap:
- Dress the lap: Before starting the polishing process, make sure to dress the ceramic lap properly. Apply polishing grit on the lap and use synthetic corundum with progressively finer grits to polish out a window on the lap. Repeat this process multiple times to achieve the desired smoothness.
- Check for scratches: After each stage of polishing, carefully inspect the gemstones and the lap for any scratches. If you notice any scratches, repeat the dressing process with the synthetic corundum until the scratches are eliminated.
- Storage and maintenance: After polishing gemstones, it is important to store the ceramic lap carefully. Avoid placing it in a way that it can get scratched or damaged. Regularly clean the lap with soap, hot water, and a plastic scrub pad to remove any residues.
| Tip | Description |
|---|---|
| 1 | Dress the lap |
| 2 | Check for scratches |
| 3 | Storage and maintenance |

By following these tips, you can achieve a flawless finish and enhance the beauty of your gemstones. Remember to dress the lap properly, check for scratches, and take proper care of the ceramic lap for optimal results.
Pre-polishing is a crucial step in the gemstone polishing process as it helps eliminate damage from the coarse grinding stage and ensures a smooth and flawless finish. By addressing any imperfections and scratches left behind, pre-polishing prepares the gemstones for the final polishing stage, resulting in a more beautiful and radiant appearance.
One effective tool for pre-polishing gemstones is the Eastern-Graves ceramic lap. This lap is specifically designed to provide optimal results in terms of removing scratches and imperfections. By following proper dressing procedures and using synthetic corundum with progressively finer grits, the Eastern-Graves ceramic lap helps eliminate any damage and ensures a high-quality finish.
Cleanliness is also a crucial factor in pre-polishing gemstones. Contamination in the form of diamond particles or other debris can cause scratches and blemishes on the gemstone's surface. Therefore, it is important to maintain a clean working environment and regularly clean and inspect the lap and the gemstones for any signs of diamond contamination.
| Importance of Pre-Polishing | Eliminating Damage from Coarse Grinding | Using the Eastern-Graves Ceramic Lap | Dressing Procedures | Diamond Contamination | Cleanliness |
|---|---|---|---|---|---|
| Ensures a smooth and flawless finish | Removes imperfections and scratches | Specifically designed for optimal results | Follow proper procedures | Regularly clean and inspect for contamination | Maintain a clean working environment |
Troubleshooting Polishing Issues
When polishing gemstones, it is common to encounter certain issues that can affect the final outcome. By understanding how to troubleshoot these problems, you can ensure a successful polishing process. Here are some common polishing issues and their solutions:
Diamond Grit Check
One of the first steps in troubleshooting polishing issues is to check the diamond grit. Uneven distribution or contamination of the diamond grit can lead to inconsistent polishing results. Ensure that the diamond grit is spread evenly across the polishing surface and free from any impurities. If necessary, clean and replace the diamond grit to achieve a more uniform and effective polishing process.
Problem with Pre-Polishing
If you encounter issues during the pre-polishing stage, such as visible scratches or uneven surfaces, it is important to address them before proceeding to the final polish. Check your pre-polishing lap and make sure it is properly dressed and free from any scratches. Adjust your polishing techniques and apply the appropriate pressure to minimize damage and create a smooth surface for the final polish.
| Troubleshooting Issue | Solution |
|---|---|
| Troubleshooting a Ceramic Lap | Check the lap for any scratches or damage. Redress the lap if necessary and ensure that it is clean and free from contaminants. |
| Problem with Pre-Polishing | Identify any visible scratches or uneven surfaces during the pre-polishing stage. Adjust your techniques and pressure to minimize damage and create a smooth surface for the final polish. |
| Using the Tin Lap | If you are a beginner or facing difficulties with a ceramic lap, consider using a tin lap as an alternative. Tin laps can be easier to work with and provide satisfactory polishing results. |
Using the Tin Lap
If you are a beginner or facing difficulties with a ceramic lap, using a tin lap can be a viable solution. Tin laps are known for their ease of use and can produce satisfactory polishing results. However, keep in mind that tin laps may not provide the same level of precision as ceramic laps. It is important to practice and experiment with different techniques to achieve the desired polish on your gemstones.
By troubleshooting these common polishing issues and applying the appropriate solutions, you can overcome challenges and achieve excellent polishing results. Remember to always assess the quality of your tools and materials, adjust your techniques accordingly, and maintain a clean and controlled environment throughout the polishing process.
Conclusion
In conclusion, polishing gemstones requires proper techniques and equipment to achieve a flawless finish. Carefully follow safety procedures and pre-polishing steps before using tumbling or Dremel methods. Eliminate damage from coarse grinding by troubleshooting issues. With patience and practice using the right gemstones and materials, you can master gemstone polishing. Experiment with different techniques to discover finishes that best suit your preferences. By prioritizing safety and the principles behind each method, you can safely enhance the radiant beauty of gemstones.
FAQ
How do I polish gemstones safely?
To polish gemstones safely, it is important to follow the right techniques and use the appropriate equipment and materials. Methods such as rock tumbling and using a Dremel tool are effective for polishing gemstones.
What is rock tumbling?
Rock tumbling is a process that involves washing, smoothing, and polishing gemstones. It is done by placing the gemstones in a barrel with water and special sand, and it is divided into several stages.
What are the principles of rock tumbling?
When rock tumbling, it is important to choose the right gemstones, maintain a clean environment, avoid metal jewelry, and ensure proper waste disposal.
How do I use a rock tumbler?
To use a rock tumbler, clean the gemstones, place them in the barrel with the appropriate amount of sand and water, and run the tumbler for several days for each stage, straining the water and washing the gemstones after each stage.
How can I use a Dremel for polishing gemstones?
To use a Dremel for polishing gemstones, draw the desired shape on the gemstone, secure it in a vice or clamp, choose the right speed, and use attachments such as sandpaper kits and polishing brushes.
Can I polish gemstones by hand?
Yes, you can polish gemstones by hand using sandpaper. This method allows for experimentation with different finishes but is less precise and technical than other methods.
How do I polish gemstones by hand using sandpaper?
To polish gemstones by hand using sandpaper, lay the sandpaper on a chopping board, rub the gemstone against the sandpaper with water, gradually move to higher-grade sandpaper, and polish with a polishing compound and cloth.
How do I troubleshoot polishing issues?
To troubleshoot polishing issues, check the diamond grit for even spread and contamination, follow dressing procedures for a ceramic lap, and adjust pressure, use appropriate grits, and maintain cleanliness throughout the process.
Why is pre-polishing important?
Pre-polishing is important for removing damage from coarse grinding and ensuring a smooth and flawless finish. It involves using the right pre-polishing lap and synthetic corundum method.
What should I do if I experience issues with polishing gemstones?
If you experience issues with polishing gemstones, check the diamond grit, follow dressing procedures, consider using a tin lap instead of a ceramic lap, pay attention to the pre-polishing stage, and adjust pressure and maintain cleanliness.